Related Posts Plugin for WordPress, Blogger...

Friday, 16 September 2016

Paneer Mushroom Hariyali Tikka / Hariyali Tikka \ Tikka recipe

Hariyali tikka is prepared with green chutney with hung curd or yogurt. Today, I tried this wonderful hariyali tikka using paneer and mushrooms with capsicum and onion dices. It is very tasty and very easy to prepare also. We can make in chicken also. I already tried hariyali chicken gravy.

I have used mint leaves, coriander leaves, curry leaves, ginger, garlic for the green chutney.  Then we have to mix with hung or thick curd. We have to use the hung curd, then only the masala will go inside the paneer and mushroom and the taste will also be very nice. We need not use any masala powders. This is my husband and my daughter's favorite recipe. I am very glad to share this wonderful recipe. Let us see how to prepare the tasty perfect hariyali tikka with paneer and mushroom.

Basic information :
Preparation time : 10 Mins
Soak time : 20 Mins
Cooking time : 20 Mins
Ingredients :
Mushroom : 1 Pack
Paneer : 150 Gm
Thick curd : 1/2 Cup
Mint leaves : 1/2 Bunch
Coriander leaves : 1/2 Bunch
Curry leaves : 10 Nos
Ginger : 1/2 Inch
Garlic : 4 Pcs
Salt : To needed
Method :
Wash the mushroom and add in boiling water for 3 minutes. Cut the paneer and add it into the hot water for 5 seconds for softening.

Make a paste with mint leaves, coriander leaves, curry leaves, ginger, garlic, cumin seeds with salt.

In a large mixing bowl, add the green chutney paste with the hung or thick curd. Mix well.

Cut the capsicum and onion in dices. Add blanched mushrooms and paneer, capsicum, onion dices with the green chutney mix. Refrigerate for 20-30 minutes.

After soaked, arrange the veggies in tikka skewers alternatively.

Grill in preheated oven till it done. We can also make tawa fry exactly like mushroom tikka which I have already posted. The link is here..Mushroom tawa tikka. After grill, serve hot with onion rings as starters.
Try this tasty hariyali paneer mushroom tikka and please post your sweet comments..

Thursday, 15 September 2016

Burger Pizza \ Home made Pizza burger

All the kids are attracted by Pizza, Burger. Introduced Pizzaburger in Domino's is a very big treat for them. I tried this recipe at home and my daughter enjoyed a lot. She was very happy. She hug me and kiss me after eating this burger pizza. She appreciated me and that's a big encourage for me. I am very happy to share this yummy recipe with you all.
I used pizza dough for this. I also tried in bun dough. That is also very nice. But in bun dough, we will add egg. Being pure vegetarian, we can use pizza dough. We can add any veggies of our innovation for stuffing. We can use egg omelet for Egg pizza burger. Come let us see how to prepare the perfect Domino's taste of pizza burger.


Basic information :
Preparation time : 20 Mins
Baking time : 25 Mins
Pieces : 2 Nos
Ingredients :
Pizza dough : 2 Rolls
Mayonnaise  : 2 Tsp
Cheese : 2 Cubes
Carrot : 2 Slices
Cucumber : 2 Slices
Onion : 2 Slices
Capsicum : 4 Pcs
Method :
Prepare  Pizza dough. Pizza dough recipe. Or Burger bun dough. Burger bun recipe
Take the pizza dough, make bun size roll and sprinkle oregano seasoning on the top.

Bake it in 200 degree Celsius for 25 minutes.

After baking the base buns, cut into two parts. Spread mayonnaise over the bun slice. Add grated cheese.

Add chopped capsicum, onion, carrots, cucumber.

Close the bun and again bake for 5 minutes.

Veg pizza burger is ready to serve hot with tomato sauce.    
Beat egg, add chopped onions, capsicum, pepper powder, salt and mix it well.

Make round omelet and add it in the bun slice over cheese.

Bake it 5 minutes. Ya... Tasty delicious Egg pizza burger is ready to serve hot.

Everyone try these mouth watering recipe and get appreciation from your kids...Please share your precious comments..  

Egg less coconut wheat cookies with choco chip \ Vegetarian cookies in whole wheat flour \ Perfect egg less coconut biscuits

Today, I tried coconut cookies in wheat flour for the first time. What a magic!., In first time itself it came very well. Crunchy, tasty and delicious cookies that all of my family members liked very much.
In this cookies recipe, I used whole wheat flour, brown sugar and other ingredients. We can also try in maida and white normal sugar also. I used the fried coconut in this cookies, that is desiccated coconut. My husband likes very much this biscuits or cookies. I am very happy to share this recipe to you all. Let us see how to prepare the tasty egg less coconut cookies.
Basic information :
Preparation time : 10 mins
Cooking time : 40 Mins
Quantity : 20 Nos
Preserve for : 1 Month
Ingredients :
Wheat flour : 1&1/2 Cup
Grated coconut : 1 Cup
Brown sugar : 1 Cup
Baking powder : 1 Tsp
Butter : 50 Grm
Vanilla essence : 1/2 Tsp
Choco chips : To decorate
Method :
Grate the coconut and dry fry it till the golden brown color comes. (Desiccated coconut).
Melt the butter and add vanilla essence in it.
In a large mixing bowl, take wheat flour, brown sugar, baking powder, desiccated coconut. Mix butter in the flour. Mix well.

Add milk and mix it well to make soft dough. No need to kneed the dough. Cover the dough in the bowl with the muslin cloth and  refrigerate for about 20-25 minutes. This will help the cookies to come in correct texture.
After 25 minutes, take lemon size ball in the dough, flatten it. Make in all the dough and arrange it in the butter greased baking tray. Add choco chips on the top by pressing by fingers.
Bake it in preheated oven in 200 degree Celsius for 35 minutes.
Hmmm...Yummy!...The tasty coconut cookies is ready to serve. Serve it after getting cool, so that we can feel the crispiness. We can preserve it in air tight container.
Try this wonderful snack and please share your valuable comments.


Tuesday, 13 September 2016

Puli Inji - Traditional Kerala food \ Onam special Inji puli \ Jinger tamarind pikkle

One of the famous traditional Kerala food item which will be served in Onam sadhya is Puli Inji. It is very tasty and it has sourness, sweetness and spicy. We can keep it in air tight container for about one month. Ginger has a lot of health benefits. With the selected ingredients, we can make this healthy tasty recipe and we can used as pickle also.
Health benefits :
Ginger is the healthiest herbal medicine. It helps to cure digestive  problems. In the time of taking heavy food in festival times, we can take ginger for digestion. It helps to cure nausea and vomiting. So it is best for pregnant ladies. Being anti-inflammatory contents in ginger, we can get relief from joint pains, if we are taking ginger regularly.

Basic information :
Preparation time : 10 mins
Cooking time : 20 Mins
Quantity : 500 Grm
Preserve for : 1 Month
Ingredients :
Ginger : 200 Grm
Green chilly : 10 Nos
Sesame seed oil : 3 Tsp
Mustard seeds : 1 Tsp
Curry leaves : 1 No
Red chilly : 3 Nos
Tamarind : 1 Lemon
Turmeric powder : 1/2 Tsp
Chilly powder : 1/2 Tsp
Salt : To taste
Jaggery powder : 1/2 Cup
Method :
 Peel of ginger, wash it and wipe to make it dry. Grate the ginger.
Take a big lemon size tamarind, soak in the hot water and extract tamarind juice. Fine chop the green chilies.
Heat sesame seed oil or gingaly oil (nallenna), add mustard seeds. Add curry leaves and red chilies after the seeds pops.
Add grated ginger and chopped chilies and saute till the raw smell of ginger goes.
Add turmeric powder, chilly powder, salt and mix.
Add tamarind pulp. Allow it to boil till the oil comes out.
When the oil spread on the top, add powdered jaggery and mix it well.
Leave for 10-15 minutes to boil in low flame. When the injipuli comes in thick consistency switch off the flame and preserve in air tight container after getting cool.
This dish will be more tasty after one or two days. It is very tasty and suitable for sambar rice.
Try this traditional recipe and please post your precious comments.

Sunday, 11 September 2016

Coconut bun \ Sweet bun \ Coconut Stuffed bun

Every time, when we used to go to bakery, myself and my daughter will definitely get attracted from coconut bun. Long time, I am thinking to prepare this yummy delicious coconut bun at home. Today, I got a chance to try this wonderful sweet bun. In first try itself it came very well and all my family members liked very much. It is so soft, sweet inside, tutti frutti's crunchiness.. Wow!...no words to explain it's taste. 
I used grated coconut and fried it. We can also use dried coconut powder or desiccated coconut. Then I add tutti frutti, and sugar. We really enjoy the taste of coconut bun. I really very glad to share this wonderful recipe to you all. Let us see how to prepare coconut stuffed bun.
Basic information :
Preparation time : 15 Mins
For foaming : 1 Hr
Baking time : 25 Mins
Ingredients :
Maida : 2 Cups
Sugar : 2 Tsp
Salt : 1/4 Tsp
Yeast : 2 Tsp
Egg  : 1 No
Butter : 25 Grms
Milk : 1/4 Cup
Sesame seeds : 1 Pinch
For stuffing :
Grated coconut : 1/2 Cup
Sugar : 2 Tsp
Tutti friutti : 2 Tsp
Cardamon powder : 1 Pinch
Method :
Take 1/4 cup of water in a bowl add active yeast and sugar and mix. Keep this mix for 5 minutes to foaming.
Melt butter. Beat one egg in same bowl.
In a large bowl, take 2 cups of maida, sugar and salt.
Keep ready with all ingredients for our dough.
Mix all the wet ingredients with maida. Add oil.
Kneed well for about 5 minutes to make a soft dough.
Keep the dough in a oil greased bowl, cover with white cloth and leave it for about 1 hour for foaming.
Grate the coconut and fry it till it completely dried up or became golden brown. Add sugar, cardamon powder and tutti frutti. Mix well and keep it aside.
After 1 hour, the dough will be double in size.
Again kneed the dough and divide equal parts.
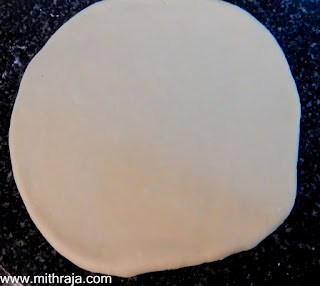
Take one divided ball ans spread it using roller and keep it aside.
Spread another ball and spread the coconut mix in the center.
Cover this using already spread dough.
Close the edges.
Beat the egg and do egg wash on the bun. Sprinkle some sesame seeds.
Bake it in 200 degree Celsius for 25 minutes. Yummy... Hot coconut bun is ready to serve with tutti frutti decoration.
Try this wonderful delicious recipe and please share your priceless comments..